

Whole House Water Filter Installation Guide: Step-by-Step for 2026
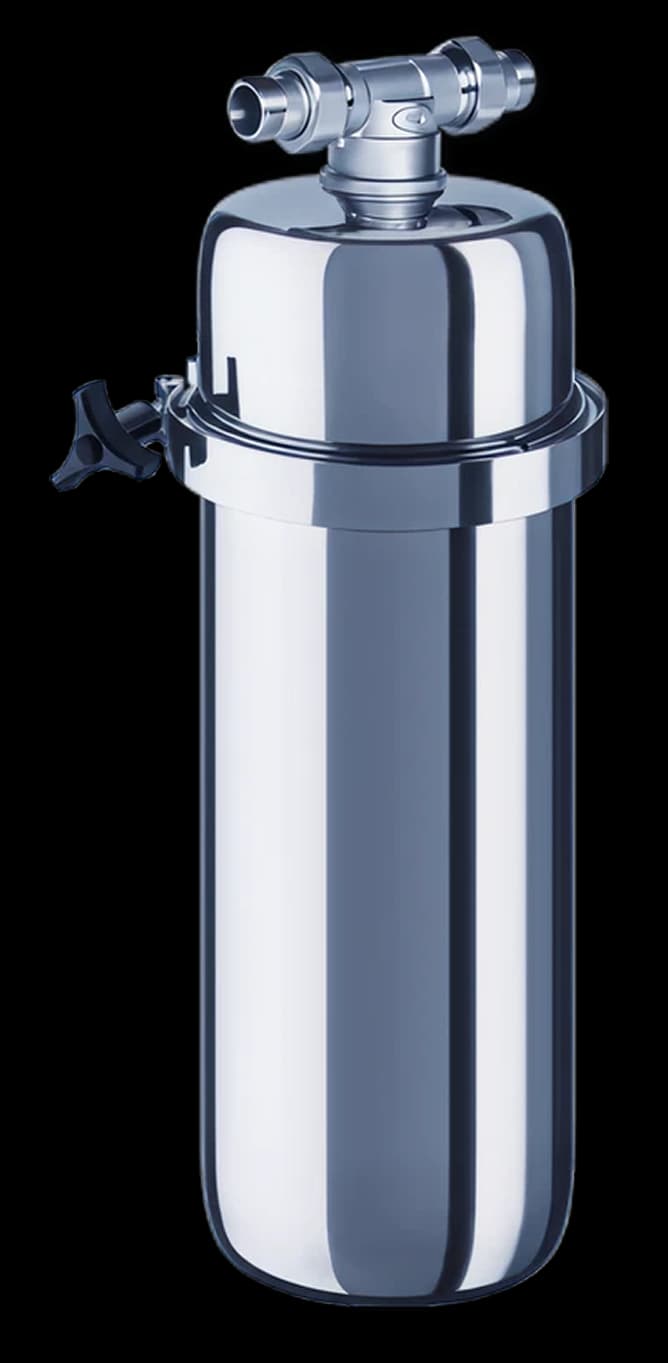
Installing a Mam Nature whole house water filter is a one-time job. In ideal conditions it takes one to two hours for the Fine Filter alone (for example "The Essential"), or two to three hours for a full set. Because of the usual conditions of your water damage insurance, the installation should be executed by a professional plumber — though if you have the professional experience needed to ensure tightness, we have done everything to ease the installation. Once it is in, the only recurring task is an annual cartridge swap, which takes ten minutes and needs no tools. Please see as well our delivery content and installation video.
This guide explains what the installation involves — the tools, the right location on your mains supply, how the connection is made, and how the system is commissioned for first use — so you know what to expect and can brief your plumber. It applies to any whole-house POE system with standard 1" BSP fittings, including the Mam Nature Essential, Essential Plus, Complete Set, and Complete Set Plus.
We recommend professional installation. Water under mains pressure requires respect — a failed fitting can cause significant water damage, and home insurance and product warranties generally expect connections to the mains to be made by a qualified installer. A plumber will do the job quickly, certify the work, and guarantee the connection.
Tools and Materials the Job Requires
For copper pipe: pipe cutter (rotary type, not hacksaw — produces a cleaner cut), pipe deburring tool or half-round file, two 1" BSP compression fittings or push-fit connectors (depending on your pipe-to-filter connection method), PTFE thread tape, adjustable spanner or 30mm open-end spanner. For plastic (PEX or MDPE) pipe: pipe cutter appropriate for plastic, push-fit or compression fittings rated for your pipe diameter.
The installation also requires a bypass valve assembly — this lets the filter be isolated for maintenance without shutting off the whole house. Mam Nature can provide you a bypass in the needed size on optional request. Alternatively, a three-valve bypass from a plumbing supplier can be used as well.
Optional but useful: bucket and towels for residual water in the pipe after shutoff, pipe-clips and screws for securing the housing bracket to the wall, spirit level to ensure the housing hangs vertically (gravity helps cartridge seating). Please see as well our tools needed video.
Choosing the Right Installation Location
The filter must install on the cold mains supply line after the water meter and the stop cock (main shutoff valve) and before the first branch to any tap, toilet, boiler, or appliance. This ensures 100% of household water passes through the water treatment system.
Choose a location that is accessible — you will be returning annually to swap the cartridge. The housing needs roughly 30cm of clearance below it to unscrew the below part of the filter housing. Avoid locations subject to freezing (uninsulated garages, external walls without insulation) — most residential filter cartridges are not rated for sub-zero temperatures.
If your system includes a Particle Filter (Essential Plus, Complete Set, Complete Set Plus), the particle filter installs upstream (before) the fine filter cartridge. The Water LIME (Complete Set, Complete Set Plus) installs upstream of both. Refer to the product's installation guide for the specific sequence, which follows: Water LIME → Particle Filter → Fine Filter → Dynamizer (if included).
Step 1 — Shut Off the Water Supply
Locate your main stop cock — usually under the kitchen sink, in a utility room, or near the water meter. Turn it fully clockwise to close. Open a cold tap downstream to confirm the supply is off and to release pressure in the pipes.
Once the tap runs dry, you have successfully depressurised the section you will be working on. Leave the tap open while you work — it confirms pressure has not built up unexpectedly and allows air into the pipe to drain residual water.
Step 2 — Mark and Cut the Pipe
Measure and mark the section of pipe to be removed. The housing needs the length of the bypass valve assembly plus the housing connection fittings — typically 250–350mm of pipe is removed. Check your bypass kit's dimensions before cutting.
Use a rotary pipe cutter for clean, square cuts on copper. Two cuts are needed — one on each side of the section to be removed. Have a bucket ready: residual water in the pipe will drain out once cut. Deburr the cut ends with a file or deburring tool to ensure fittings seat correctly.
Step 3 — Fit the Bypass Valve and Housing
Connect the bypass valve assembly to the cut pipe ends using your chosen fittings (compression or push-fit). Wrap the BSP threads on the filter inlet/outlet ports with PTFE tape (3–5 turns clockwise as viewed from the thread end) before connecting to the bypass ports.
Mount the housing bracket on the wall. The housing hangs vertically from the bracket — ensure it is level. Hand-tighten the clamp of the Fine Filter housing — do not use a spanner to tighten; overtightening damages the thread and O-ring.
Connect the bypass valve ports to the filter housing inlet and outlet. Ensure the inlet (water in) connects to the correct port — the housing is typically marked with flow direction arrows.
Step 4 — Commission the System
Close the bypass valve isolator handles (so water is diverted through the filter). Slowly open the main stop cock — quarter turn, pause, check for leaks, quarter turn further. Do not open fully in one movement; a sudden pressure surge can unseat fittings before they have had a chance to establish a water-tight seal under pressure.
Check every connection point for drips. A torch helps. Run your hand around each fitting. Small weeps at compression fittings can often be resolved with a quarter-turn of the spanner. If a push-fit fitting leaks, shut off, pull the fitting, inspect the pipe end (must be square, clean, and fully inserted), and reseat.
Once the system holds pressure without leaks, open a cold tap at the furthest point from the filter and flush for five minutes. The first water through a new cartridge may contain fine particles from the manufacturing process — these are harmless but should be flushed before drinking. The water will run clear within a few minutes.
Annual Cartridge Replacement
The replacement procedure reverses installation at the housing only — the bypass valve and pipe connections are permanent. Shut the bypass valve (divert water around the Fine Filter to maintain water provision to the house during the replacement procedure), open a downstream tap to release pressure, unscrew the clamp of the bottom part of the Fine Filter housing by hand (anti-clockwise to loosen when viewed from below), pull the old cartridge, insert the new one, position the bottom part of the housing with the clamp, tighten the clamp (clockwise), re-open the bypass, check for leaks, flush five minutes. The whole procedure takes ten minutes and interacts only with the bottom part of the Fine Filter housing — the upper part of the Fine Filter housing and the bypass valve stay in place.
Set a calendar reminder for 12 months from installation. If you notice flow reduction, taste change, or visible turbidity before 12 months, replace the cartridge early — these are signs of saturation.
Swiss-made whole-house filter with full installation guide, drill template, and all hardware included.
Shop Whole-House SystemsRelated Resources
Frequently Asked Questions
Do I need a plumber to install a whole house water filter?
Yes, we recommend a plumber — also to ensure continued coverage from your water damage insurance. This is despite the fact that we have eased the installation of our system to the maximum, with all the needed connectors, flat seals, drill template and installation manual. Professional installation is essential if your supply pipe is lead, iron, or galvanised steel (common in pre-1970 buildings). If you are renting, check your tenancy agreement first — landlord consent is typically required for any modification to the mains.
How long does the installation take?
The modular design, compact housing, flat sealing connectors and a borehole plan streamline the process. We provide comprehensive installation guides with each system. However, each installation situation is different and has to be evaluated by the executing sanitary installer.
What pipe size do I need?
Mam Nature systems use 1" BSP (British Standard Pipe) connections — the standard for European residential mains supply in 22mm copper or 25mm MDPE pipe. Some supplies are 15mm (common in older UK properties or smaller flats). In any case, measure your supply pipe before ordering the correct connector — your plumber has the solution, as this is his daily work.
Can I install the filter if I have a combi boiler?
Yes. The filter installs on the cold mains supply line, upstream of where the pipe splits to feed the cold outlets and the boiler. Both will receive filtered water. If your system includes the Water LIME anti-limescale device, this also protects the boiler heat exchanger from scale build-up.
What if my pipe is plastic (PEX or MDPE)?
Push-fit fittings rated for your pipe material work with PEX and MDPE supply pipes. For MDPE (typically blue, for underground supply), use MDPE-rated compression fittings or push-fit connectors. Check fitting compatibility with your pipe diameter and material before purchasing — your plumber has the solution, as this is his daily work.
Sources & References
- Water Regulations Advisory Scheme (WRAS). Guidance on installation of water treatment devices.
- European Standard EN 13443-1. Water conditioning equipment inside buildings — mechanical filters.
- Mam Nature Swiss AG. Installation video, delivery content and tools-needed video (on the Complete Set and Complete Set Plus product pages).